Want better local SEO rankings? Start geotagging your photos. Geotagging embeds your location’s GPS coordinates into your image files, helping search engines confirm your business’s physical address. This boosts your visibility in local searches and Google’s Map Pack.
Key Takeaways:
- Geotagging adds GPS data (latitude and longitude) to photo metadata.
- Search engines use this data to verify your location, reinforcing your local SEO.
- Tools like GeoImgr or built-in device settings make geotagging quick and easy.
- Rename files with descriptive, location-based names (e.g., “plumber-dallas-tx.jpg”).
- Use alt text and compress images without stripping metadata for faster loading.
Why It Matters: 97% of people use search engines to find local businesses, but 58% of businesses fail to optimize for local SEO. Adding geotagged photos can increase your visibility by up to 23%, making it a simple yet impactful strategy.
Next Steps: Enable geotagging on your device, edit metadata with tools like GeoImgr, and upload location-tagged images to your Google Business Profile and website. Consistency across platforms is key for local SEO success.
What is Geotagging and How Does It Help Local SEO?
Geotagging Basics
Geotagging involves embedding geographic coordinates - like latitude and longitude - into the metadata of digital files such as photos and videos. This information is stored in the Exchangeable Image File (EXIF) metadata, which holds technical details about the file.
Many devices automatically record GPS coordinates when you capture an image. If your device doesn’t, you can add the coordinates manually using specific tools. Search engines can then read this metadata to determine the location where the image was taken.
EXIF metadata doesn’t stop at location data; it also includes details like camera settings, date, time, and tags. This combination of information helps search engines better understand your content and, importantly, can influence how your content performs in local search rankings.
Local SEO Benefits of Geotagged Photos
Geotagged photos can significantly improve your local search visibility by verifying your business location. When search engines detect geotagged images, they associate them with your geographic area, making your business more relevant in local searches and Google’s Map Pack.
These images often rank higher in local search results because they provide users with accurate, location-specific information. Given that 97% of people use search engines to find local businesses and that 58% of businesses fail to optimize for local search, geotagging offers a clear advantage. It’s a simple yet often overlooked strategy that can help your business stand out in local search results.
How to GeoTag Photos for Better Local SEO
How to Geotag Your Photos
Step-by-Step Guide to Geotagging Photos for Local SEO
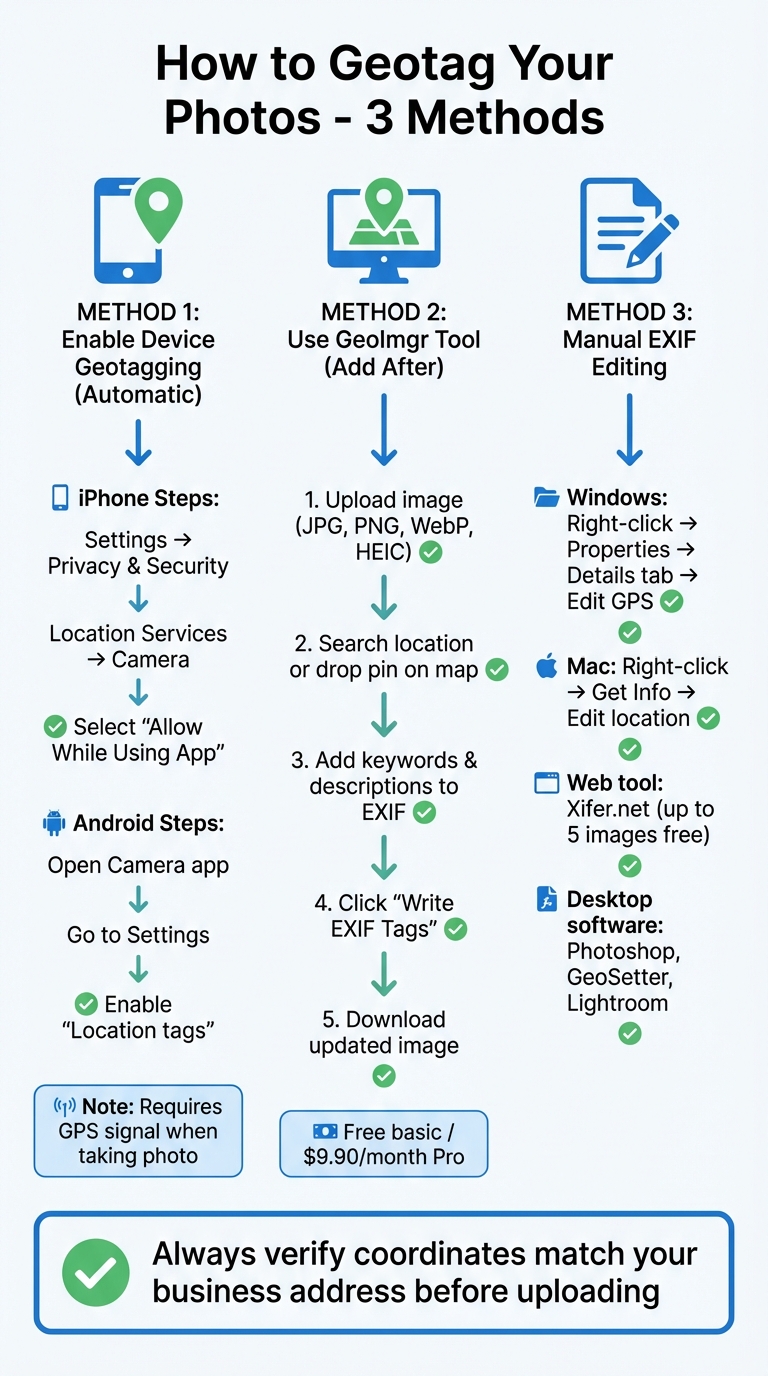
Turn On Geotagging on Your Device
Most modern smartphones make it easy to geotag photos by embedding location data automatically - just make sure the feature is enabled. On an iPhone, head to Settings, go to Privacy & Security, tap Location Services, select Camera, and choose "Allow While Using App." For Android users, open your Camera app, find Settings, and switch on the "Location tags" option. Once activated, your phone will attach GPS coordinates to each photo, provided you have a signal when the picture is taken.
If you’re using a digital camera with built-in GPS, the process is similar. Check your camera’s menu for GPS or location settings and turn them on. Keep in mind that automatic geotagging requires a GPS signal, so it might not work indoors or in areas with weak reception. In those cases, you can always add the location manually later.
If your photos don’t have GPS data, tools like GeoImgr can help you add it afterward.
Add Geotags Using GeoImgr
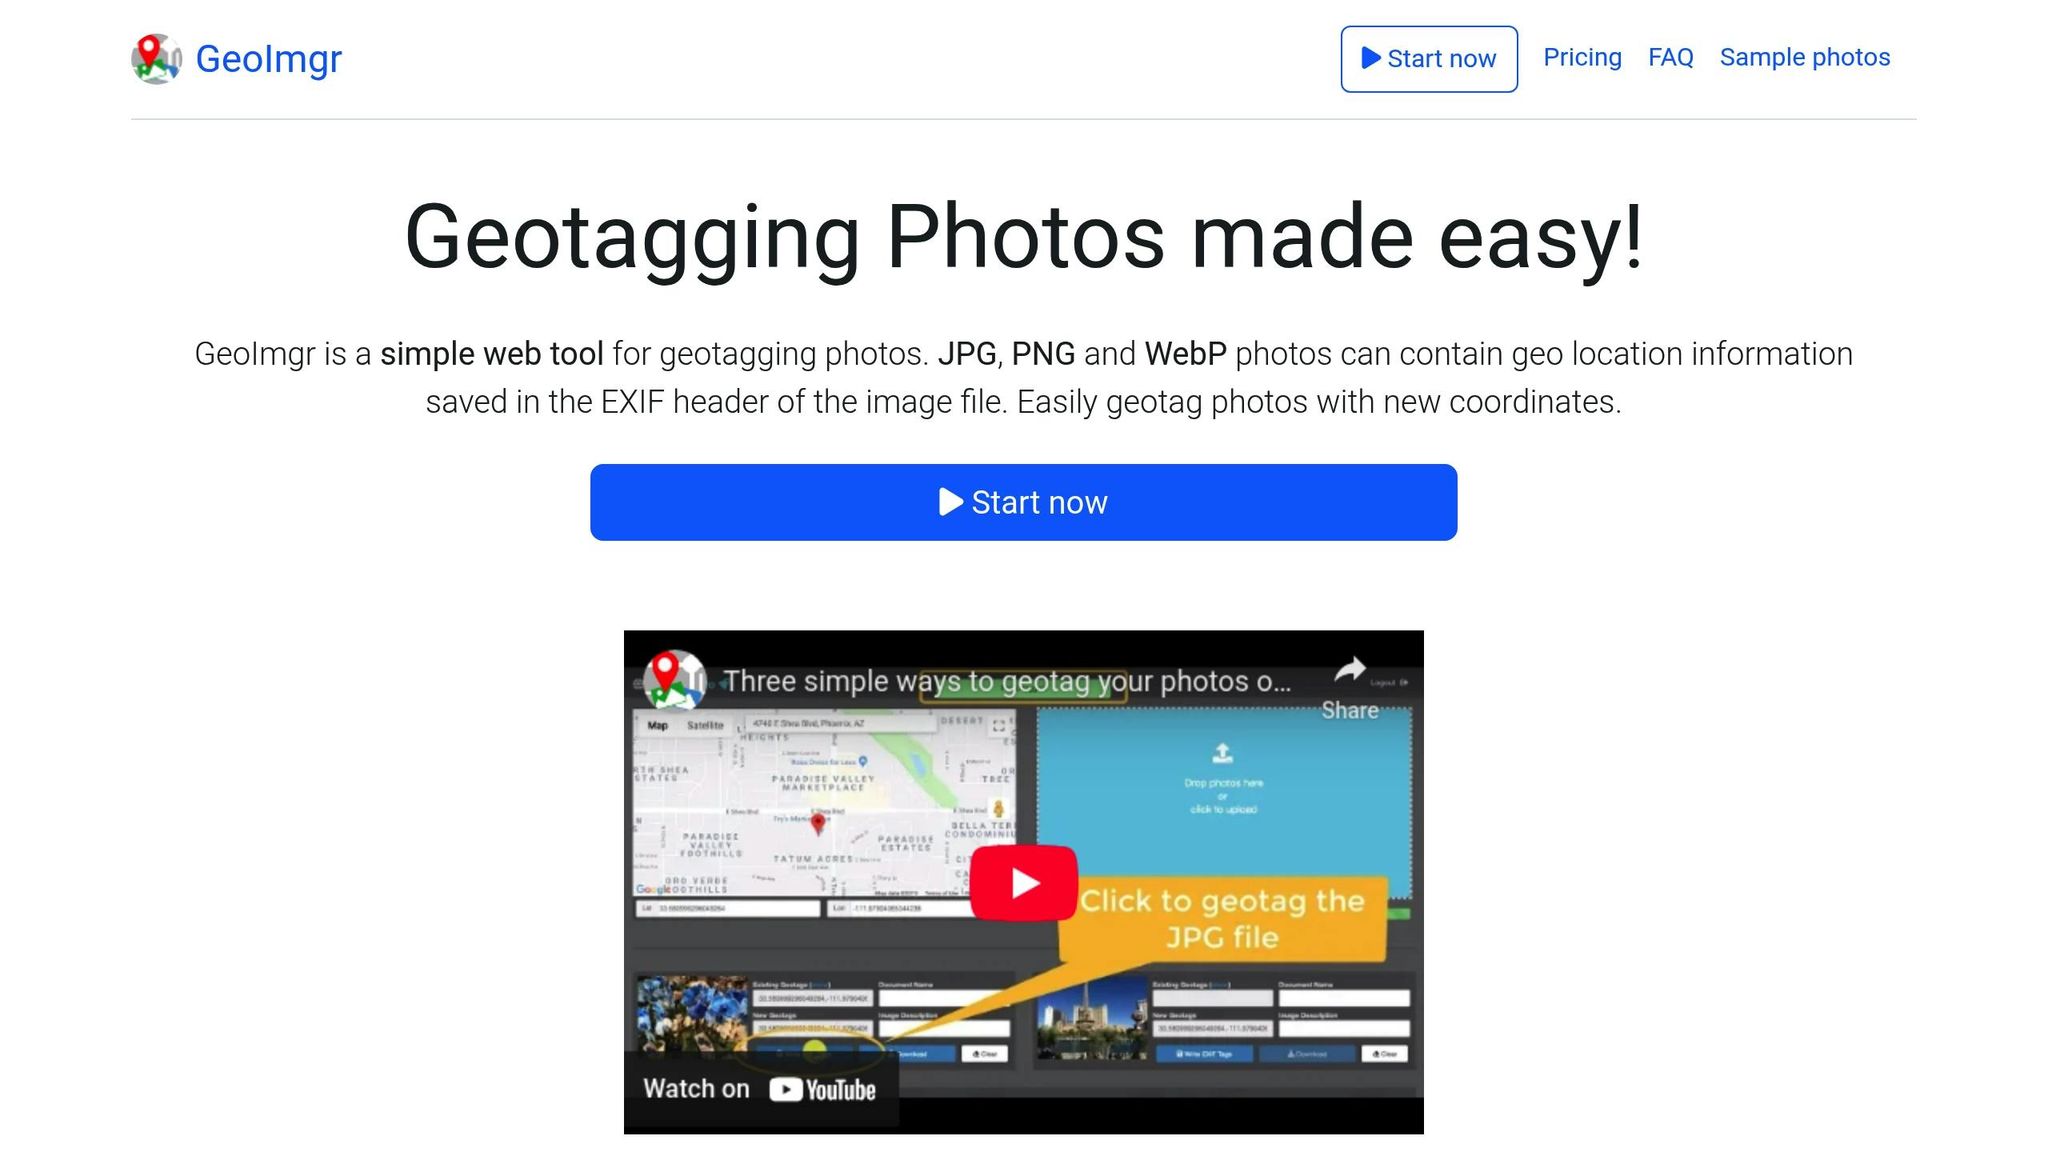
GeoImgr is a straightforward tool for adding location data to photos that don’t already have it. Start by uploading your image (supported formats include JPG, PNG, WebP, and HEIC) to the GeoImgr website. From there, you can search for your desired location or drop a pin on the map to generate coordinates. The tool also allows you to include keywords and descriptions in the photo’s EXIF header, which can improve its visibility in searches. Once you’re satisfied, click "Write EXIF Tags" to embed the data, confirm the map marker is accurate, and download the updated image.
GeoImgr offers a free version for basic geotagging, while its Pro plan ($9.90/month) supports batch processing for multiple files.
Edit Geotags Manually with EXIF Editors
If you need to fix or add geotags to photos taken without location services, manual EXIF editing is a handy solution. On Windows, right-click your image, select Properties, go to the Details tab, and update the GPS section. For Mac users, right-click the image, select Get Info, and edit the location data directly.
For a simpler, browser-based option, try theXifer.net. This tool lets you upload up to five images for free and includes a "Google Places Search" feature to quickly pinpoint addresses. Once the edits are complete, download the updated files with the new location data. If you need more advanced control, desktop software like Adobe Photoshop, GeoSetter, or Lightroom can handle more complex edits, though they may require some practice to master.
No matter which method you use, always double-check the updated coordinates to ensure they’re accurate.
sbb-itb-0e6533f
How to Optimize Geotagged Images for Better Results
Once your photos are geotagged correctly, the next step is to fine-tune them for better local SEO performance.
Rename Files and Add Metadata Thoughtfully
Ditch generic file names like "IMG1234.jpg" and opt for something more descriptive, such as "best-plumber-dallas-texas.jpg." This approach clearly signals both the content and location of your image to search engines.
Take advantage of hidden EXIF fields by filling in details like Title, Subject, Tags, Comments, and Author. Use relevant keywords, product names, or even your founder's name to make the metadata work harder for you. According to industry insights, Google extracts more data from a single photo's metadata than from an entire Google Business Profile listing.
Ensure the latitude and longitude in your image metadata match the address listed on your Google Business Profile. Any inconsistencies here can negatively impact your local SEO, much like mismatched Name, Address, and Phone (NAP) information. Properly aligned metadata reinforces your business details and strengthens your local SEO strategy.
Use Alt Text and Compress Images Wisely
Alt text should do more than describe the image - it should also tie it to a location. For example, instead of generic alt text like "storefront photo", go with something like "london-bakery-fresh-croissants-display." This helps search engines understand both the image content and its geographical relevance.
When compressing images, use tools that maintain EXIF data. This ensures faster page loading speeds without stripping away essential geotagging information. Tools like GeoImgr allow you to embed EXIF tags and download optimized versions of your images while preserving all location details.
Keep Geotagged Originals When Uploading
Before uploading, double-check the geotagged coordinates in your file properties to confirm they are accurate.
"The key to this trick is tagging Google images with the latitude and longitude coordinates for your business address prior to uploading them to your GMB profile." – Red Drum SEO
Once verified, delete untagged versions of the images to avoid duplicate content issues. Use the same geotagged files across all platforms - your website, social media pages, and business directories. Consistency in geotagged images sends a strong signal to Google, helping confirm your business's legitimacy and improving your chances of showing up in the Google Map Pack.
How to Check Your Geotagged Images
After adding GPS data to your images, it's important to double-check the coordinates before uploading. Incorrect data can negatively impact your local SEO efforts.
Verify Geotag Data in File Properties
If you're using Windows, right-click the image file, select "Properties", then go to the "Details" tab. Look for the "GPS" section to find the coordinates. If you don’t see a GPS header, it means the image hasn’t been geotagged.
For Mac users, right-click the image file and choose "Get Info." Under the "More Info" section, you’ll find the Latitude and Longitude. Alternatively, open the image in Preview, go to "Tools", select "Show Inspector", and click the (i) tab to locate the GPS data.
On mobile devices, the process is even easier. On an iPhone, open the Photos app, select the image, and swipe up to view the map and coordinates. For Android users, tap the three-dot menu in the photo viewer, choose "Details", and check the map along with the GPS data.
Keep in mind that screenshots or images downloaded from platforms like Facebook or Instagram often won’t have geotags. These platforms strip GPS metadata to protect user privacy.
Once you've located the GPS data in your file properties, cross-check the coordinates on a map to ensure they’re accurate.
Test Your Geotagged Photos
Take the coordinates from your file and paste them into Google Maps to confirm they align with your business location. For a more visual approach, you can use online tools like GeoImgr or Online EXIF Viewer to verify the tags.
Before uploading to your Google Business Profile, always verify the data on your own device. Google Business Profile doesn’t let you view or extract geotag information after the photo is live.
If you discover missing or incorrect metadata, you can update it using tools like GeoImgr. Once you’ve ensured the data matches your physical business address, delete any untagged versions of the image to avoid duplicate content issues.
Conclusion
Adding geotags to your photos might not single-handedly transform your local search rankings, but it’s a smart move within a broader local SEO strategy. By embedding GPS coordinates into your images, you provide search engines with a clear indicator of your business's physical location. Pair this with keyword-rich file names and descriptive alt text, and you’ve got a recipe for improving local relevance.
Consider this: 97% of search engine users are looking for local businesses, yet 58% of companies overlook local SEO entirely. In one case study, implementing geotagging led to a 23% boost in visibility - proof that even small optimizations can make a noticeable difference.
"SEO success is not about doing one thing perfectly but about doing many small things a little better." – Matt, Grapefruit SEO
To get started, apply the geotagging techniques covered in this guide to your existing image library. Once tagged, upload these images to your Google Business Profile, embed them on location-specific pages of your website, and share them across your social media platforms. Double-check that the geotags align with your business address for maximum impact.
While geotagging is just one piece of the puzzle, it strengthens your overall local SEO strategy when combined with other best practices. Creating a consistent online presence across platforms is key to long-term success. The best part? Geotagging is quick, straightforward, and often free or low-cost. For just a few minutes of effort per image, you can achieve lasting benefits for your local visibility.
FAQs
What is geotagging, and how does it help with local SEO?
Geotagging is the process of embedding geographic coordinates - latitude and longitude - into a photo’s metadata. This simple step helps search engines connect the image to your business's physical location, making it more likely to show up in local searches or "near me" queries. In turn, geotagged photos can enhance your visibility in local search results and improve your rankings on Google Maps.
When you use geotagged images on your website or Google Business Profile, you’re essentially telling search engines that your business is tied to a specific area. This increases your chances of appearing in relevant local searches and helps bring in nearby customers.
What are the best tools to geotag photos for local SEO?
Geotagging your photos is a smart way to boost local SEO by embedding location data directly into your images. Luckily, there are several tools that make this process straightforward:
- GeoTagSeo: This tool lets you add latitude, longitude, keywords, and meta descriptions to your images. It’s a simple and effective choice for small businesses looking to enhance their local presence.
- GeoImgr: With this tool, you can attach GPS coordinates to your photos. Its premium features even allow you to search for coordinates by entering a business name, making it especially handy.
- ExifTool: If you’re tech-savvy or working with larger batches of images, ExifTool might be your go-to. It’s a powerful solution for editing EXIF metadata, including geolocation tags.
Another option? Use a GPS-enabled camera or smartphone. When location services are active, these devices automatically embed location data into your photos. Pick the method or tool that works best for you to ensure your images contribute to better local search visibility.
Does geotagging photos help my business show up on Google Maps?
Geotagging photos can add location details that might help your business show up more often in local search results, like on Google Maps. That said, Google often strips out photo metadata and doesn't place much weight on geotags for rankings. So, the overall impact on visibility tends to be quite limited.
For better results with local SEO, prioritize optimizing your Google Business Profile, actively managing customer reviews, and keeping your business details consistent across online directories. Geotagging can be a small part of the equation, but it's most effective when combined with a well-rounded local SEO strategy.